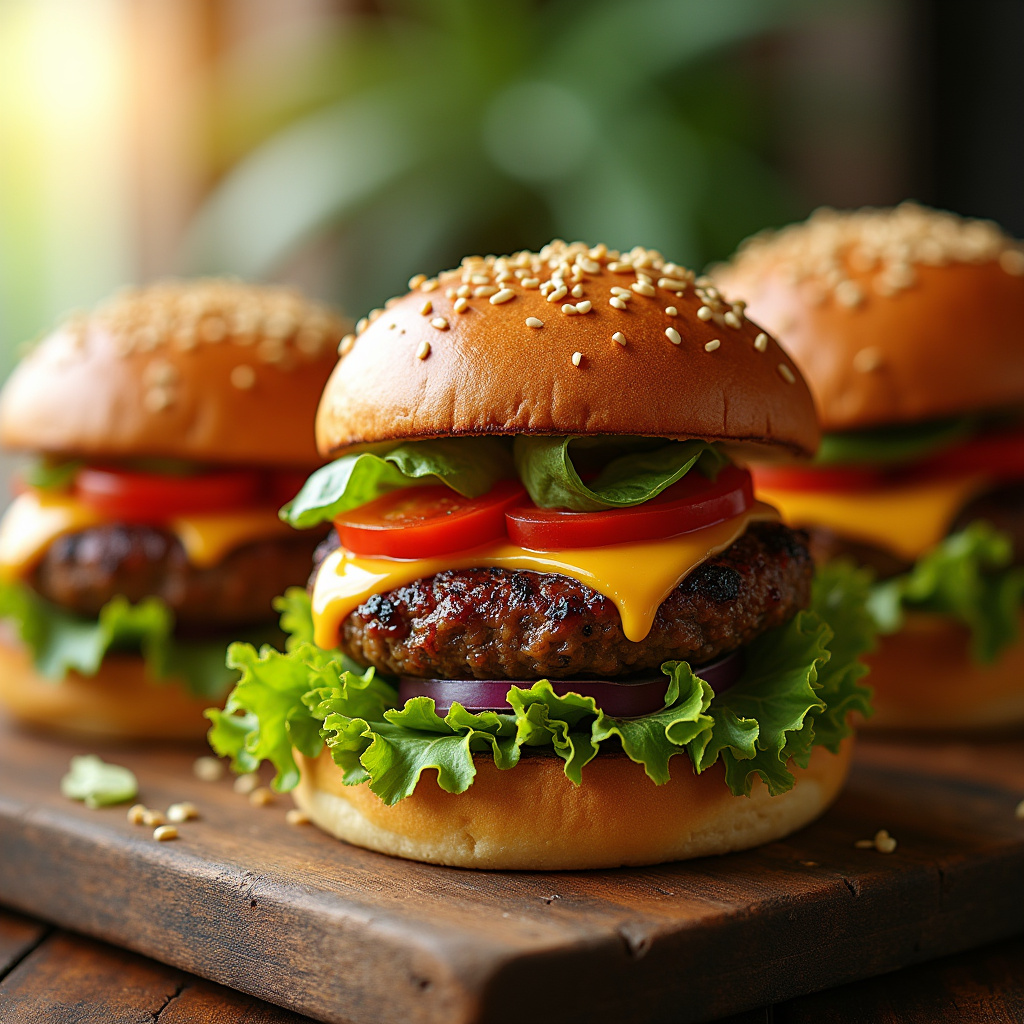
Summer grilling isn't complete without a burger that's juicy, flavorful, and so easy you can make it any night of the week. These easy burgers for summer are exactly what you need when the sun's out and you want something delicious without spending hours in the kitchen. They're perfectly seasoned, cook in under 15 minutes, and taste like they came from your favorite burger joint. This is the one I make every single weekend from Memorial Day through Labor Day — it's become our family's official summer dinner.
Why You'll Love This Recipe
- ✓Takes just 10 minutes to prep and 8 minutes to grill — perfect for busy weeknights
- ✓The secret seasoning blend creates restaurant-quality flavor with just pantry staples
- ✓Stays incredibly juicy without any fancy techniques or special ingredients
- ✓Works perfectly on the grill, stovetop, or even in your air fryer
- ✓Easy to customize with your favorite toppings and cheese without changing the base recipe
- ✓The patties hold together beautifully and won't fall apart on the grill
Prep Time
10 mins
Cook Time
8 mins
Total Time
18 mins
Servings
4
Ingredients
You'll need just a handful of simple ingredients to create these incredibly flavorful easy burgers for summer.
For the burger patties:
- 1½ lbs (680g) ground beef, 80/20 blend
- 1 tablespoon Worcestershire sauce
- 1 teaspoon garlic powder
- 1 teaspoon onion powder
- 1 teaspoon smoked paprika
- ¾ teaspoon kosher salt
- ½ teaspoon black pepper
- ¼ teaspoon cayenne pepper (optional)
For serving:
- 4 hamburger buns, toasted
- 4 slices cheddar, American, or your favorite cheese
- Lettuce leaves
- Sliced tomatoes
- Sliced red onion
- Pickles
- Condiments of your choice (ketchup, mustard, mayo)
The 80/20 beef blend is key here — it's got enough fat to stay juicy without being greasy. If you can only find 85/15 or 90/10, it'll still work but might be slightly less juicy. Don't use anything leaner than 90/10 or your burgers will be dry. You can find smoked paprika in the spice aisle of any grocery store, and it adds an amazing depth of flavor that makes these taste like they've been cooking over charcoal all day.
How to Make Easy Burgers for Summer
These burgers come together so quickly you'll wonder why you ever bought frozen patties.
- Prepare your workspace. Line a baking sheet with parchment paper and set it near your work area. If you're grilling, preheat your grill to medium-high heat, about 400°F (200°C). If using a stovetop, wait to heat your pan until the patties are formed.
- Mix the seasonings. In a small bowl, combine the Worcestershire sauce, garlic powder, onion powder, smoked paprika, salt, black pepper, and cayenne if using. Mix thoroughly so the spices are evenly distributed — this prevents any patty from being over or under-seasoned.
- Combine with beef gently. Place the ground beef in a large bowl and pour the seasoning mixture over it. Using your hands or a fork, gently mix until just combined, about 30 seconds. Don't overmix or your burgers will be tough and dense instead of tender and juicy.
- Form the patties. Divide the meat into 4 equal portions (about 6 oz or 170g each). Shape each into a patty about ¾ inch thick and slightly wider than your buns — they'll shrink as they cook. Press your thumb into the center of each patty to create a small indent, which prevents the burgers from puffing up into balls on the grill.
- Chill briefly if time allows. Place the formed patties on your prepared baking sheet and refrigerate for 10-15 minutes. This isn't required, but it helps them hold together better on the grill, especially if your kitchen is warm.
- Oil the grill grates. Right before cooking, use tongs and a paper towel dipped in vegetable oil to grease your grill grates. This prevents sticking and gives you those beautiful grill marks. If using a stovetop, heat a cast iron skillet or heavy pan over medium-high heat and add 1 tablespoon of oil.
- Cook the first side. Place the patties on the grill or in the pan, making sure they're not touching. Cook without moving them for 4 minutes. You'll see the edges start to brown and the burgers will release easily from the grates when they're ready to flip.
- Flip and finish cooking. Flip the burgers once and cook for another 3-4 minutes for medium (160°F/71°C internal temperature) or 4-5 minutes for well-done (165°F/74°C). If adding cheese, place it on during the last minute of cooking and cover with a lid or aluminum foil tent to help it melt.
- Rest the burgers. Transfer the cooked patties to a clean plate and let them rest for 2-3 minutes. This allows the juices to redistribute throughout the meat instead of running all over your plate when you bite in.
- Toast the buns and assemble. While the burgers rest, place your buns cut-side down on the grill or in the pan for 30-60 seconds until lightly golden and toasted. Assemble your burgers with your favorite toppings and serve immediately while they're hot and juicy.
💡 Baker's Tips
Don't press down on the burgers: I know it's tempting to smash them with your spatula while they cook, but this squeezes out all the delicious juices and makes them dry. Let them cook undisturbed for the juiciest results.
Use a meat thermometer: The best way to know when your burgers are done is to check the internal temperature. Insert an instant-read thermometer into the side of the patty (not through the top) for the most accurate reading.
Keep patties cold before cooking: If you're making multiple batches, keep the uncooked patties in the fridge until right before they go on the grill. Room temperature meat spreads and loses its shape more easily.
Recipe Variations
◆ BBQ Bacon Burgers
Mix 2 tablespoons of your favorite BBQ sauce into the meat along with the other seasonings. Top each cooked burger with crispy bacon strips, caramelized onions, and an extra drizzle of BBQ sauce. The sweet and smoky combination is absolutely incredible and tastes like summer cookouts.
◆ California Burgers
Skip the cheese and instead top your burgers with fresh avocado slices, crisp lettuce, tomato, red onion, and a spread of mayo mixed with a little lime juice. Add sprouts or microgreens for an extra fresh crunch. This lighter version is perfect for hot summer days when you want something that feels fresh and bright.
◆ Mushroom Swiss Burgers
While your burgers cook, sauté sliced mushrooms in butter with a little garlic until golden and tender. Top each burger with Swiss cheese during the last minute of cooking, then pile on the mushrooms. Add a smear of Dijon mustard on the bun for a sophisticated twist that tastes like it came from a steakhouse.
What to Serve With Easy Burgers for Summer
These burgers pair beautifully with classic summer sides that keep the meal easy and delicious:
- Classic coleslaw: The cool, crunchy texture is the perfect contrast to a hot, juicy burger
- Crispy sweet potato fries: Bake them in the oven while you prep the burgers for an easy side everyone loves
- Grilled corn on the cob: Throw it on the grill alongside your burgers and brush with butter and lime
- Pasta salad: Make it ahead so dinner comes together in minutes when you're ready to eat
- Watermelon slices: Nothing says summer like fresh watermelon — it's the easiest "side dish" ever
- Baked beans: Whether homemade or from a can, they're a cookout classic that everyone expects and loves
Storage & Make-Ahead Tips
These burgers are best fresh off the grill, but you've got options if you need to prep ahead or save leftovers.
- Refrigerator: Store cooked burgers in an airtight container for up to 3 days. Reheat gently in a covered skillet over medium-low heat or in the microwave at 50% power to avoid drying them out.
- Freezer (cooked): Wrap each cooked burger individually in plastic wrap, then place in a freezer bag for up to 3 months. Thaw overnight in the fridge and reheat as above.
- Freezer (uncooked): Form the patties and freeze them on a baking sheet until solid, then transfer to a freezer bag with parchment paper between each patty. They'll keep for up to 4 months. Thaw completely in the fridge before cooking — don't cook from frozen or the outside will burn before the inside is done.
- Make-ahead: You can form the patties up to 24 hours ahead and keep them covered in the fridge. This actually helps them hold together even better on the grill. Just remember to bring them to room temperature for 15-20 minutes before cooking for the most even results.
- Meal prep: Form and freeze individual patties, then pull out only what you need for quick weeknight dinners all summer long.
Common Mistakes to Avoid
✗ Overmixing the meat
When you work the meat too much, the proteins bind together tightly and create a dense, tough texture instead of a tender, juicy burger. Mix just until the seasonings are incorporated — about 30 seconds max — and handle the meat as little as possible when forming patties.
✗ Flipping too many times
Constantly flipping your burgers prevents them from developing that beautiful caramelized crust and makes them stick to the grill. Flip exactly once — after 4 minutes on the first side — and you'll get perfect results every time with gorgeous grill marks and maximum juiciness.
✗ Using lean ground beef
Ground beef that's 93% lean or higher doesn't have enough fat to keep your burgers juicy, and they'll end up dry and crumbly no matter how carefully you cook them. Stick with 80/20 for the perfect balance of flavor and moisture — the fat renders out during cooking anyway.
✗ Cooking on too-high heat
Super high heat might seem like it'll give you a great sear, but it actually burns the outside before the inside cooks through. Medium-high (around 400°F/200°C) is the sweet spot where you get beautiful browning and a fully cooked interior at the same time without any charred, bitter spots.
Frequently Asked Questions
Can I make these burgers in the oven?
Absolutely. Preheat your oven to 400°F (200°C) and place the patties on a baking sheet lined with parchment paper or a wire rack. Bake for 15-18 minutes, flipping once halfway through, until they reach 160°F (71°C) internally. They won't have grill marks, but they'll be just as juicy and flavorful. You can broil them for the last 1-2 minutes if you want some char on top.
What's the best way to prevent burgers from shrinking?
That thumb indent in the center is your secret weapon. As burgers cook, the edges tighten and pull inward, causing the center to puff up. The indent counteracts this by giving the center somewhere to expand into, so your burgers stay flat and the same size as your bun. Make it about ½ inch deep and you'll see a huge difference.
Can I use ground turkey or chicken instead?
You can, but you'll need to make a few adjustments. Ground poultry is much leaner, so add 1 tablespoon of olive oil to the mixture to help keep them moist. You'll also need to cook them to 165°F (74°C) internally for food safety. They won't be quite as juicy as beef, but they're a great lighter alternative. Consider adding extra seasonings since poultry has a milder flavor.
How do I know when my burgers are done without a thermometer?
While a thermometer is the most accurate method, you can press the center of the burger gently with your finger. If it feels firm with just a little give, it's medium. If it's very firm with no give, it's well-done. The juices should run clear, not pink. That said, an instant-read thermometer costs about $15 and takes all the guesswork out — it's worth
Easy Burgers for Summer
Juicy, perfectly seasoned beef burgers that are simple to make and ideal for backyard grilling.
🧂 Ingredients
- 1½ lbs ground beef (80/20)
- 1 tsp salt
- ½ tsp black pepper
- ½ tsp garlic powder
- 4 hamburger buns
- 4 slices cheddar cheese
- Lettuce, tomato, and onion for toppings
📋 Instructions
- Preheat grill to medium-high heat.
- Mix ground beef with salt, pepper, and garlic powder in a bowl.
- Divide mixture into 4 equal portions and form into patties about ¾-inch thick.
- Make a small indent in the center of each patty with your thumb.
- Grill patties for 4-5 minutes per side for medium doneness.
- Add cheese slices during the last minute of cooking.
- Toast buns on the grill for 30 seconds.
- Assemble burgers with desired toppings and serve immediately.
Cuisine: American
Category: Main Course
Difficulty: Easy